Ultimate DIY Horseshoe Pit Build Plans Houseful of Handmade
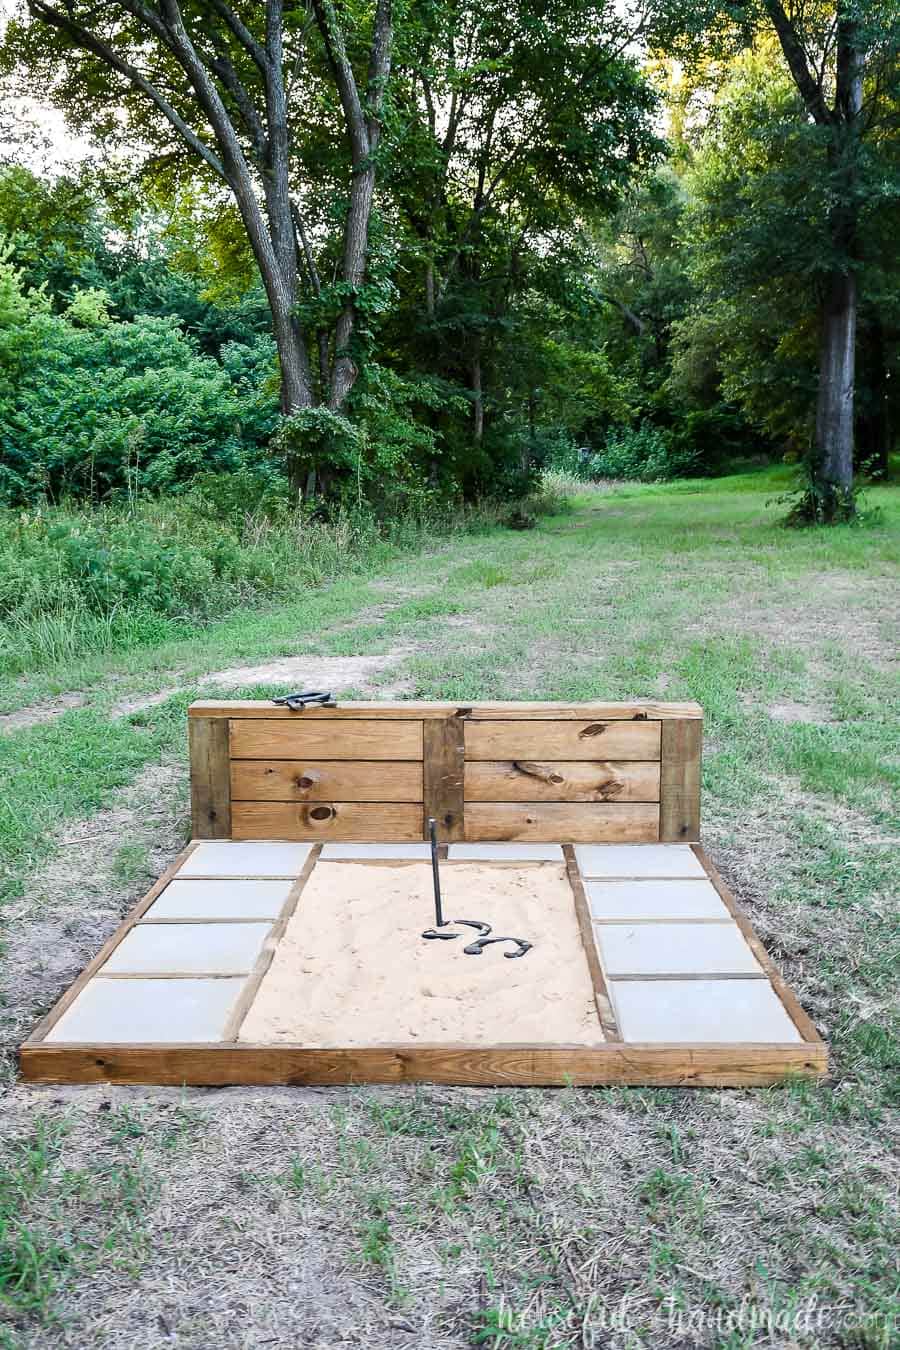
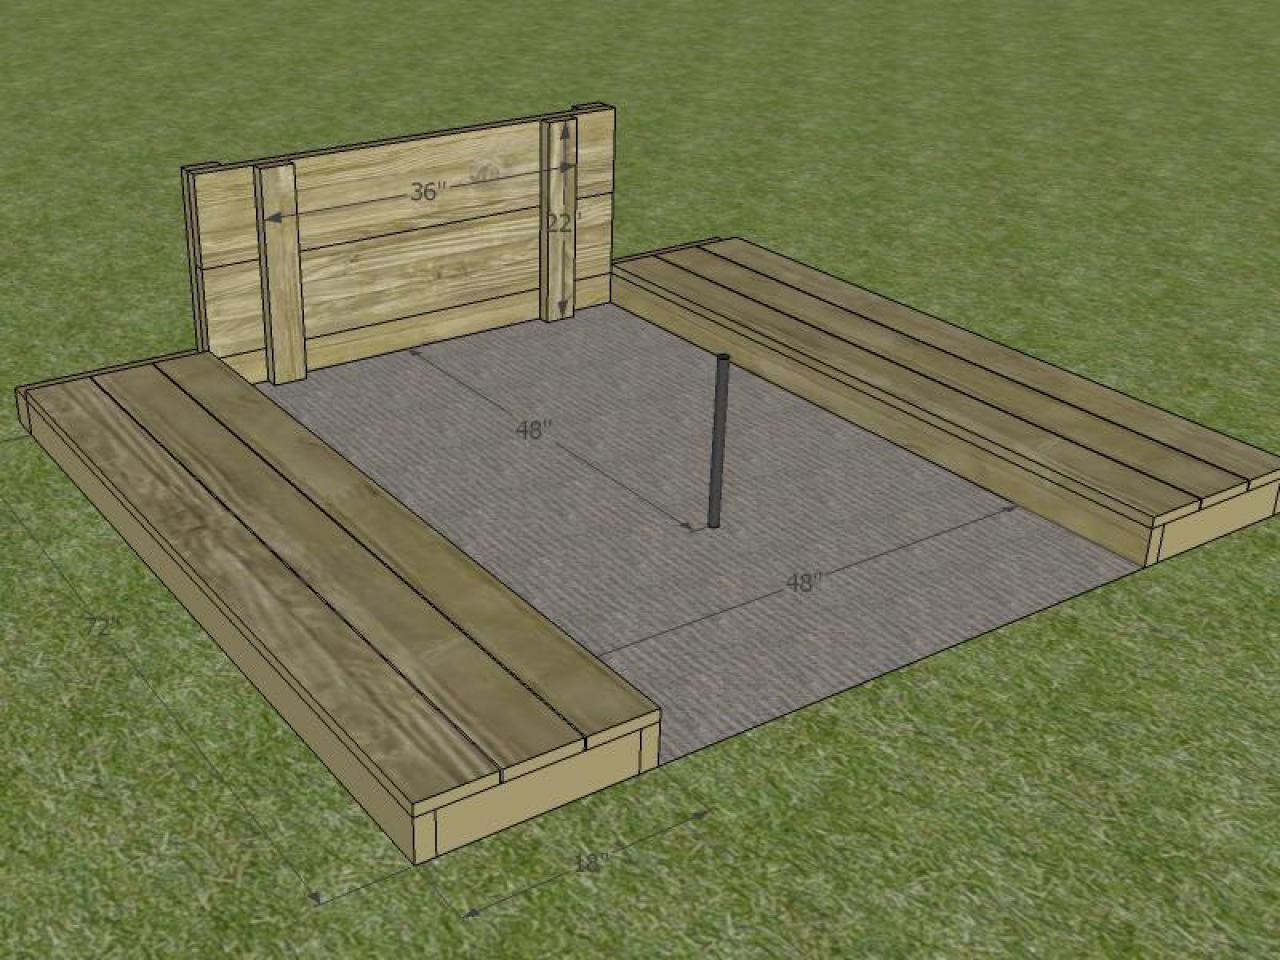
Step 4: What's at stake. You can pick up a set of horseshoes and the stake at any sporting goods store. The stake should be placed 36″ from the front of each frame. Using a hammer, plant the stake in the ground leaving 18″ of the stake above ground. The stake should lean forward to the front of the pit about 2 - 3 inches.
Horseshoe Pit Home Design Ideas, Pictures, Remodel and Decor
Step 3: Gather Your Tools and Materials. Once you figure out where you're going to put your horseshoe pit and how large it's going to be, you need to gather all the materials and tools you'll need to build it. Ensure you purchase enough lumber for the size pit you've chosen to build.

How to Build A Horseshoe Pit How To Build It
STEP 1: Measure Your Space In a "regulation" pit, horseshoe pit dimensions require stakes be exactly 40 feet apart. Those stakes should sit within a box that—while at least 31 by 43.

How to Build a Horseshoe Pit howtos DIY
Finde Fancy im Preisvergleich zum absoluten Schnäppchen-Preis. Einfach anziehend.

Horseshoe Pits on Pinterest Horse Shoe Pit, Backyards and
Check out the step by step guides; build one today. Also visit the Washers Game page for additional backyard fun. Build a Horseshoe Pit Horseshoes is a classic game that is fun for the whole family. Learn how to build a permanent horseshoe pit in your backyard. Read more. DIY Horseshoe Pit Plans Why not build a horseshoe pit?

Horseshoe pits done easy. Backyard projects, Diy backyard, Outdoor
Thanks for sharing. Have 3 recommendations. 1. Don't cut top until your ready for it. 71 3/4" turned out a smidge too small for me. 2. Use 2" pilot screws for the top - 2 1/2 went through the top. 3. Most important - concrete pavers break when hot my metal horseshoes. Use Rubberific 16x16 pavers!

How to Build a Horseshoe Pit DIY Instructions for Your Home Court in
Let's get started! In this post we'll cover: How to Build a Horseshoe Pit. Step 1: Finding the Perfect Spot. Step 2: Getting the Measurements Right. Step 3: Building your horseshoe pit frame. Step 4: Do some digging. Step 5: Placing your frame in the trench. Step 6: Staking it out.
12 DIY Backyard Landscape & Design Ideas for Chico, California
1 Gather the necessary materials. To fashion the frames for a pair of opposing horseshoe pits, you'll need 2 6 ft (1.8 m) 2x6 (38mm x 140mm) boards, 2 8 ft (2.4 m) 2x6 (38mm x 140mm) boards, and a few spare 2x6s to fashion backboards, if you decide you want them.

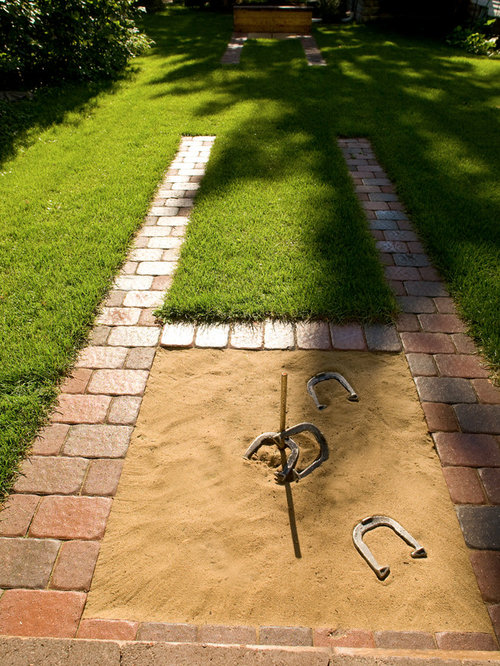
Paver borders on a horseshoe pit? Ringer! 🐴👟 Horseshoe pit, Horseshoe
Adding Stakes and Dirt. Your stakes should be set a minimum of 21 inches from the front of your horseshoe box and stick up about 15 inches from the ground. When driving the stakes into the boxes, position them so that they lean slightly toward the other pit at a three inch angle. Next, fill your boxes with dirt.

Horseshoe Pits with covers that backstops. Backyard diy
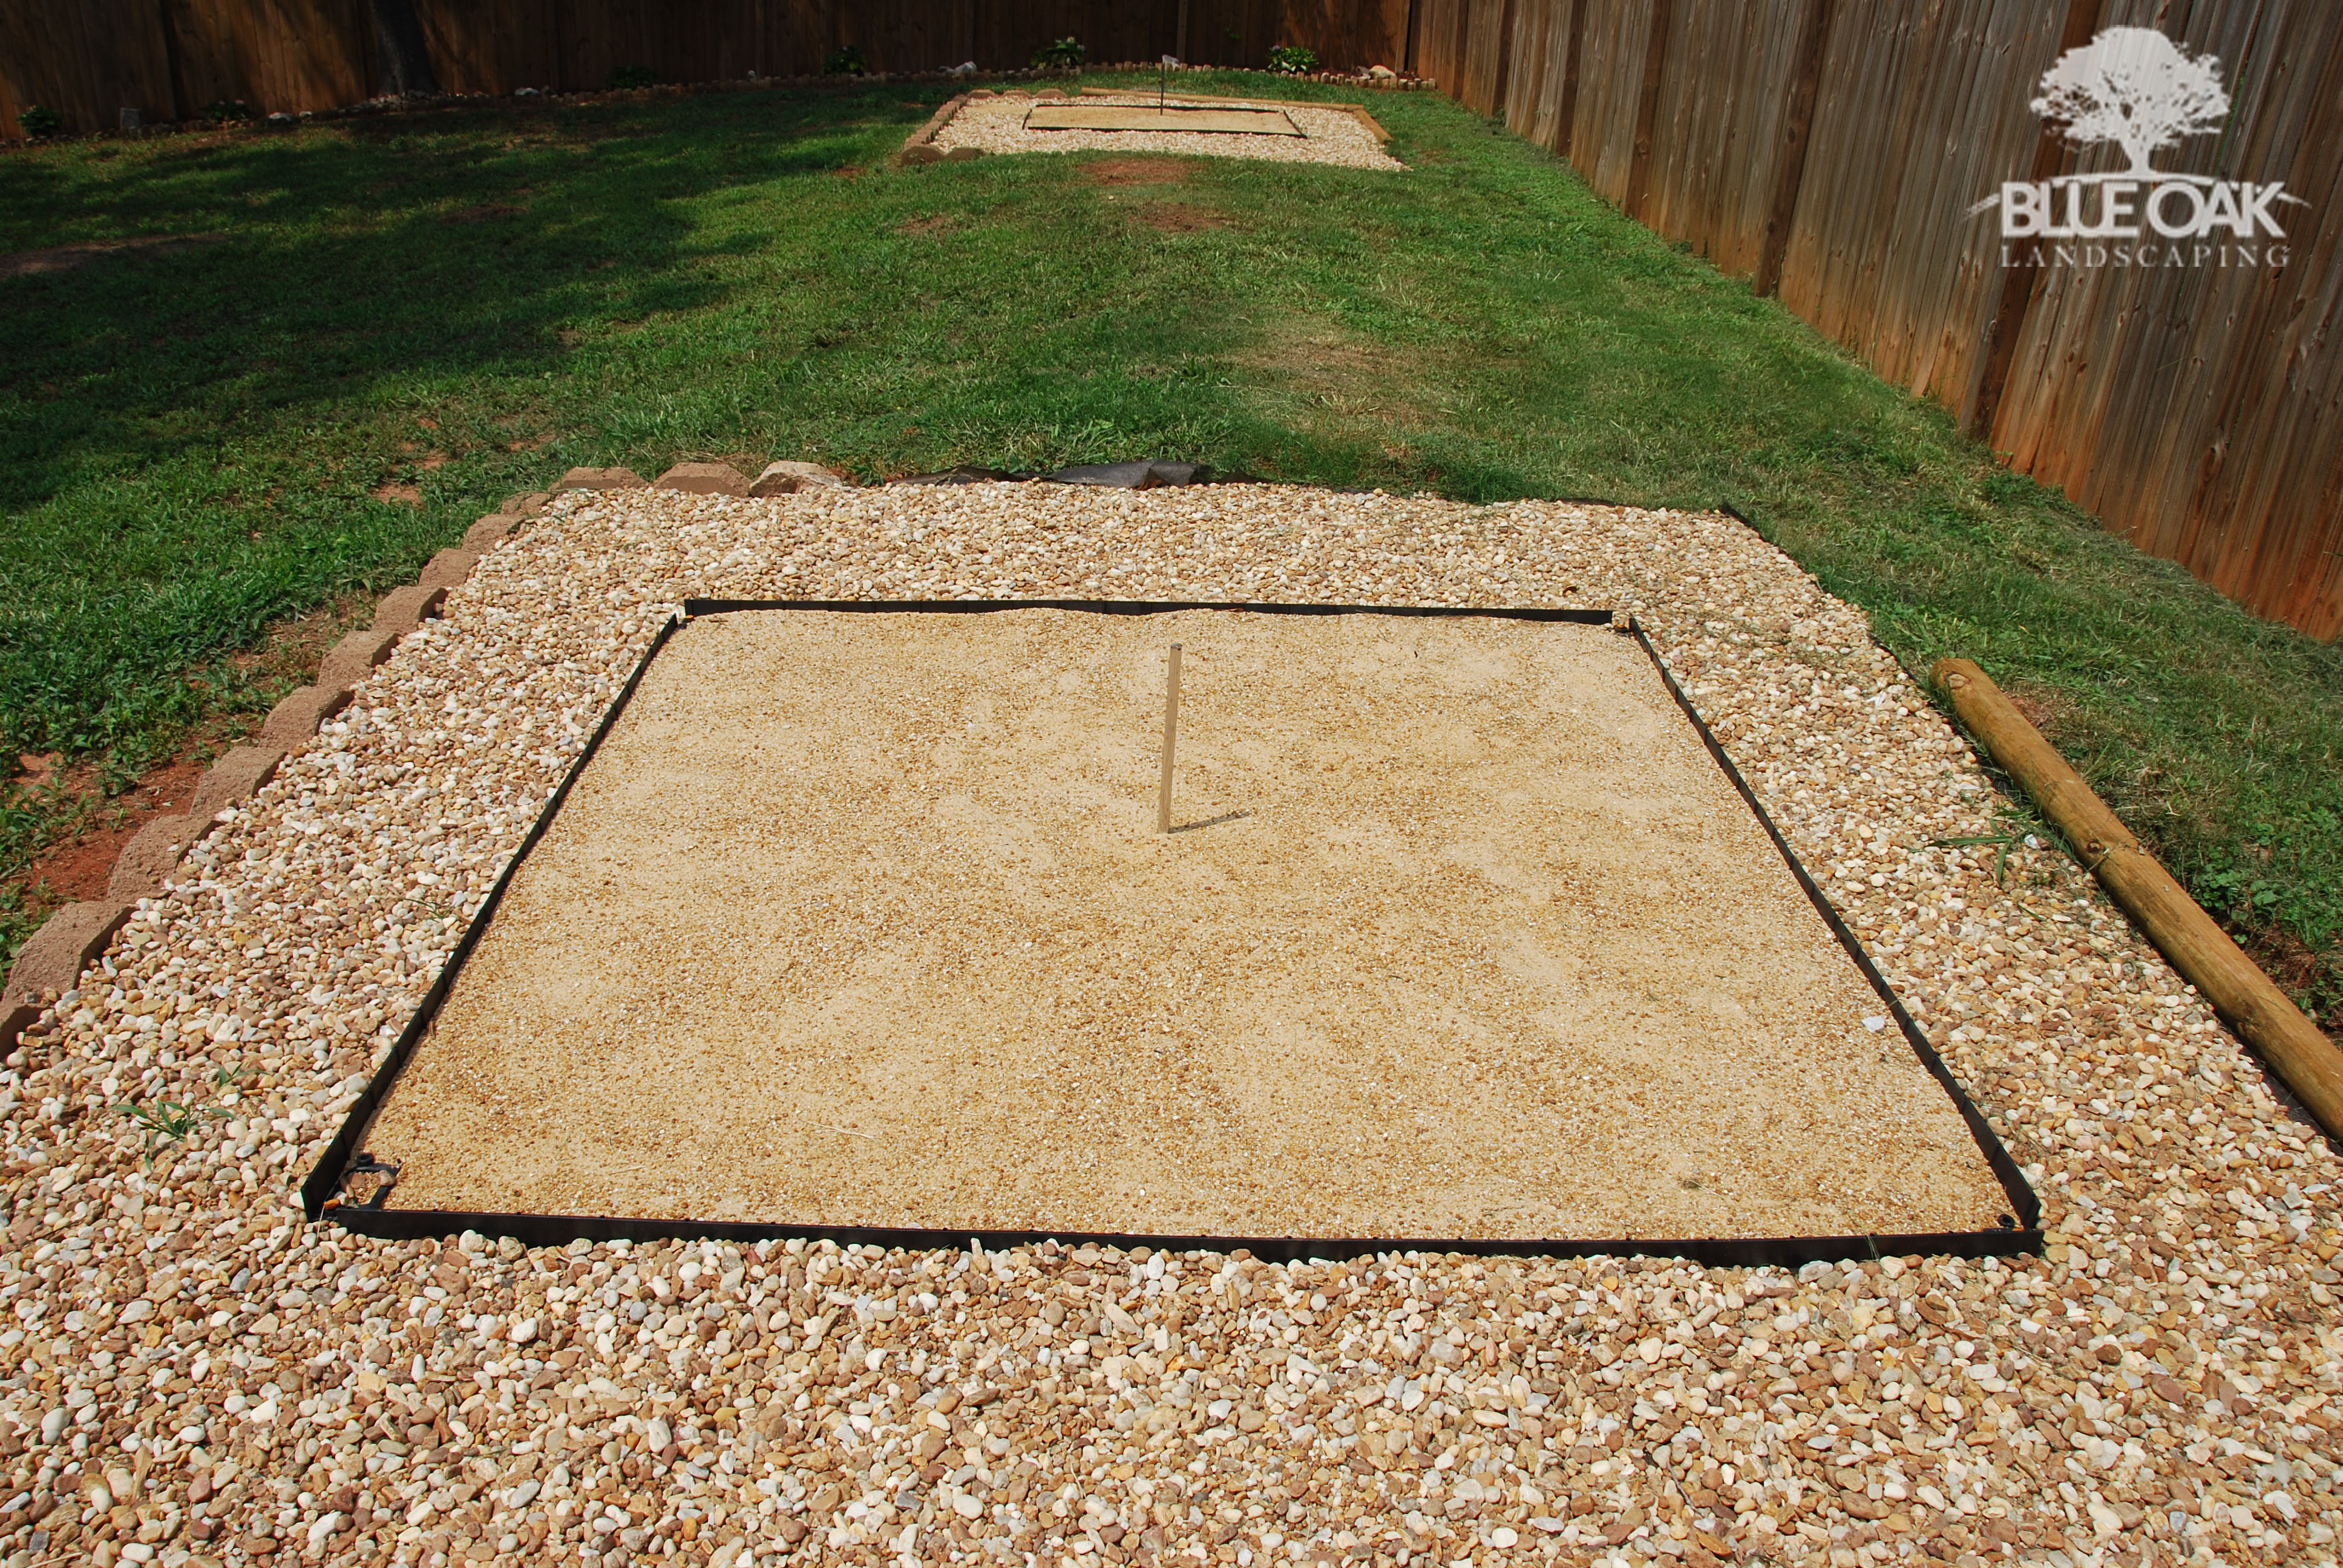
The horseshoe pit is a grey gravel pit with a pole in the center. Smaller bricks outline the front of the pit, bringing it together. Double-Sided Delight Take your horseshoe pit to the next level with this stylish double-sided design. For the box, bricks were placed in three layers at the back.
How to Build a Horseshoe Pit howtos DIY
Image FineArtAmerica FunFact - People put horseshoes over doorways because many of them thought it was a sign for good luck and it protected whoever walked under it from evil spirits. Playing By The Rules The game is played by two to four players taking turns pitching their horseshoes.

Awesome horse shoe pits!! Horseshoe pit, Diy yard games, Backyard
Learn to steps and materials needed to build a simple DIY horseshoe pit or ring-toss game for your backyard in a single weekend.

Ultimate DIY Horseshoe Pit Build Plans Horseshoe pit, Outdoor yard
Step ONE - Cutting the Pressure Treated Posts. Step TWO - Nailing the pressure treated beams together with galvanized nails. Step THREE - Adding Landscape Fabric to the bottom of the Horseshoe Pit Step FOUR - Hammering in the Stakes for the Horseshoes Step FIVE - Add Sand to each Horseshoe Pit. Step SIX - Playing Horseshoes

Back yard hand built horse shoe pits with led lights MadeByColtSkinner
Royal Ct. - Grand Junction Tallgrass Landscape & Construction Another view of the custom horse shoe pit area. The unfinished area to the rear of the yard will eventually be a garden area with raised beds and possibly a small shed. S. Kurtenbach Save Photo Rustic Country Creative Environments

Back yard hand built horse shoe pits with led lights MadeByColtSkinner
Whether you're hosting a gathering with friends or creating memories with your family, a horseshoe pit is fun for all ages. A horseshoe pitching court can be simple: Two stakes driven in the ground 40 feet apart or add them to clay pits, concrete pitching lanes and elevated backstops.

Horseshoe pits with a backstop/ bar top! ”outdoorfirepitparty
The minimum depth must be four inches, and recommended for professional play is eight inches. Dig the box evenly with the shovel. After digging, disperse sand evenly until the entire depth is levelled. The best type of sand for this purpose is play sand. Play sand is made of granite which gives it a glittery look.